
Introduction
Chandeliers have always been a symbol of elegance and sophistication. They add a touch of glamour and drama to any room they adorn. From the grand chandeliers of the 18th century to the contemporary modern-day designs, chandeliers have continued to evolve in their form and function.
One of the latest trends in chandelier design is the use of painting techniques to create unique and personalized art pieces. Painting chandelier art is a great DIY project that can be done with ease, and it can add a unique character to any space.
Why Paint a Chandelier?
There are several reasons why painting a chandelier can be a great idea. Firstly, it is a cost-effective way to give an old and outdated chandelier a new lease of life. By painting the chandelier, you can change its color and style to match the décor of your room.
Secondly, painting a chandelier can make it truly unique. Instead of settling for a generic off-the-shelf chandelier, you can create a personalized piece that reflects your style and personality.
Finally, painting a chandelier can be a fun and creative DIY project. It is a great way to unleash your artistic side and create something that is both beautiful and functional.
Materials Required
Before you start painting your chandelier, you need to gather the materials required. Here is a list of the materials you will need:
- Chandelier
- Paint Primer
- Sandpaper
- Spray Paint
- Clear Coat
Step-by-Step Guide to Painting a Chandelier
Here is a step-by-step guide to painting a chandelier:
Step 1: Remove the Chandelier
The first step is to remove the chandelier from the ceiling. Make sure to turn off the power supply to the chandelier before you start working on it.
Step 2: Clean the Chandelier
Use a soft cloth to clean the chandelier thoroughly. You can also use a mild detergent to remove any dirt, grease, or grime.
Step 3: Sand the Surface
Use sandpaper to roughen the surface of the chandelier. This will help the primer and paint to adhere better to the surface.
Step 4: Prime the Chandelier
Apply a coat of paint primer to the chandelier. The primer will help the paint to adhere better, and it will also help to cover up any imperfections.
Step 5: Paint the Chandelier
Once the primer is dry, you can start painting the chandelier. Spray paint is the best option for painting a chandelier as it gives a smooth finish. Apply the paint in thin layers, and make sure to cover all the nooks and crannies.
Step 6: Apply Clear Coat
Once the paint is dry, apply a clear coat to the chandelier. This will help to protect the paint and give it a glossy finish.
Step 7: Reinstall the Chandelier
Once the clear coat is dry, you can re-install the chandelier in its place. Make sure to turn on the power supply and watch your newly painted chandelier come to life.


More Posts
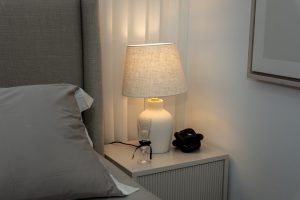
Modern Bedside Table Lamps: USB-Enabled Convenience
Modernize Your Living Room with Black Floor Lamps
Exquisite Gold-Leaf Ballroom Chandelier: A Luxe Touch