If you’re looking to add a bold, industrial touch to your home decor, a DIY concrete lamp shade might just be the perfect project. Not only is it a unique piece that can easily become a conversation starter, but it’s also relatively easy to make, even if you don’t consider yourself particularly handy. In this article, we’ll go through the steps and materials you’ll need to make your own concrete lamp Looou shade, as well as some tips and tricks for a successful outcome.
Materials
Before we get started, let’s take a look at what you’ll need to gather for this project:
- Quikrete concrete mix
- Bucket or large container to mix concrete
- Water
- Large plastic mixing spoon
- Light bulb socket kit
- Lamp cord
- Scissors
- Masking tape
- Sandpaper or files
- Stencils (optional)
Steps
Now that you have all the necessary materials, let’s dive into the steps for making your very own concrete lamp shade:
Step 1: Mix the concrete
Start by mixing the concrete in a large bucket or container according to package instructions. You’ll want to make enough to fill your lamp shade mold, so be sure to measure the amount of concrete mixture you’ll need before mixing. Use a large plastic mixing spoon to make sure all the concrete is properly blended.
Step 2: Prep your mold
Now, you’ll need a mold for your concrete lamp shade. You can use any shape or size, as long as it’s large enough to fit the light bulb socket kit you’ll be using. Here are a few ideas:
- A round silicone mold
- A large, clear plastic container or bowl
- A balloon or beach ball, inflated to the size you want your lamp shade to be
Whatever you decide to use, be sure to coat the inside with cooking spray or petroleum jelly. This will make it easier to remove the concrete once it’s set.
Step 3: Pour concrete mixture into mold
Carefully pour the concrete mixture into your prepared mold. You’ll want to fill it about 1/3 to 1/2 of the way full to allow space for the light bulb and socket kit.
Step 4: Insert light bulb socket kit
Once the concrete has set slightly (about 20-30 minutes), you can insert the light bulb socket kit into the center. Be sure to follow the manufacturer’s instructions for installation.
Step 5: Finish pouring concrete
Once the socket kit is secure, you can finish pouring the remainder of the concrete mixture into the mold. Tap the mold gently on a table or countertop to remove any air bubbles and smooth out the surface.
Step 6: Let it set
Now, you’ll need to let the concrete set for at least 24 hours (or according to package instructions) before removing it from the mold.
Step 7: Remove from mold and sand
Once the concrete is set, you can remove it from the mold by gently peeling it away from the edges. If you used a balloon or infla


More Posts
Exquisite Gold-Leaf Ballroom Chandelier: A Luxe Touch
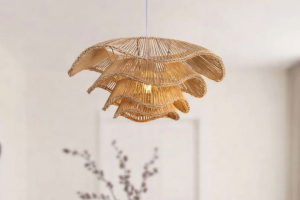
Rustic Rattan Dome Pendant Light for Restaurant Ambiance
App-Controlled Smart Desk Lamp Enhances Ambient Lighting